|
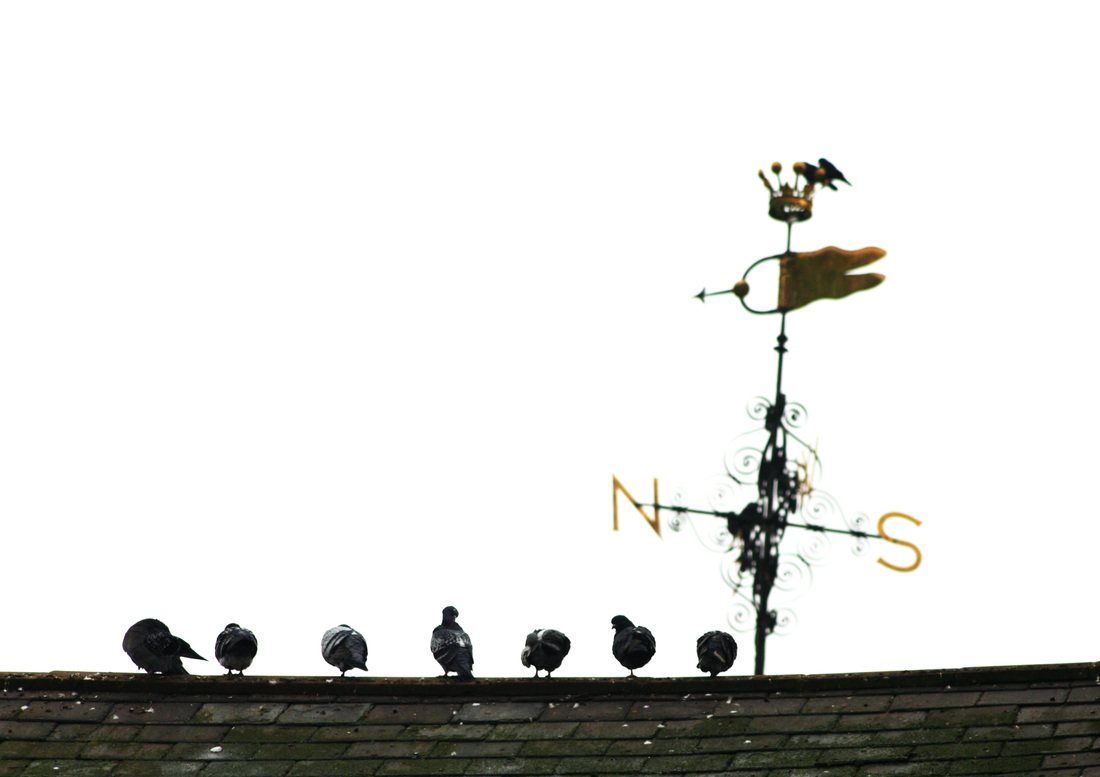
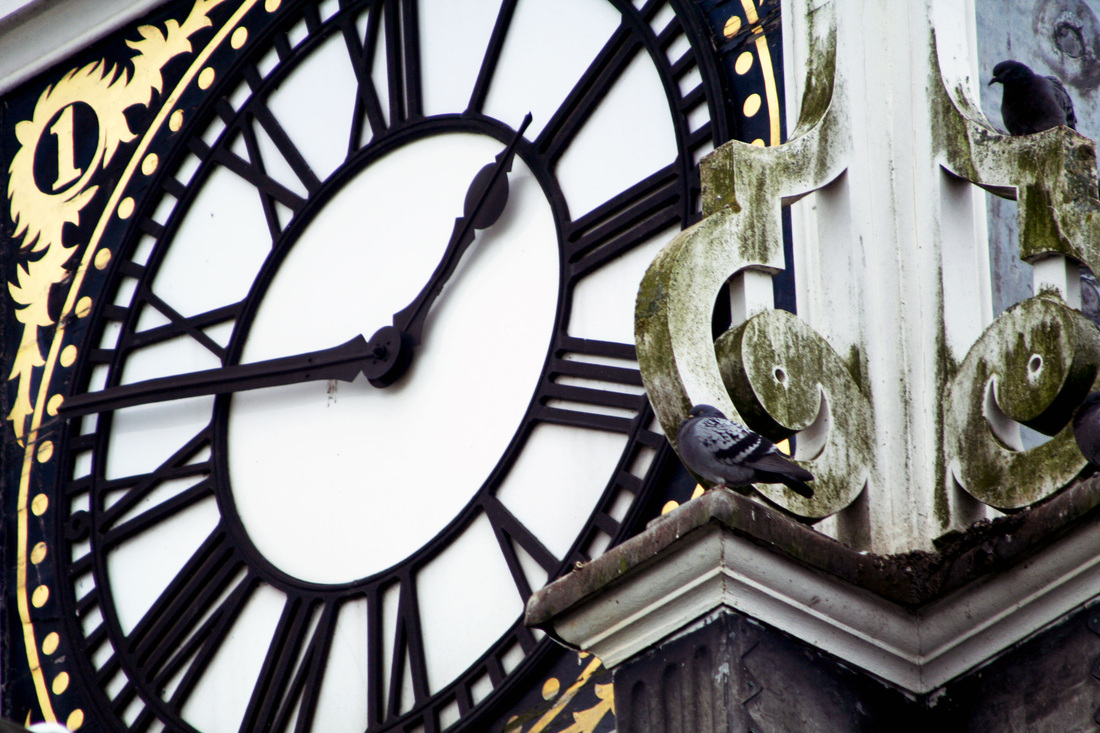
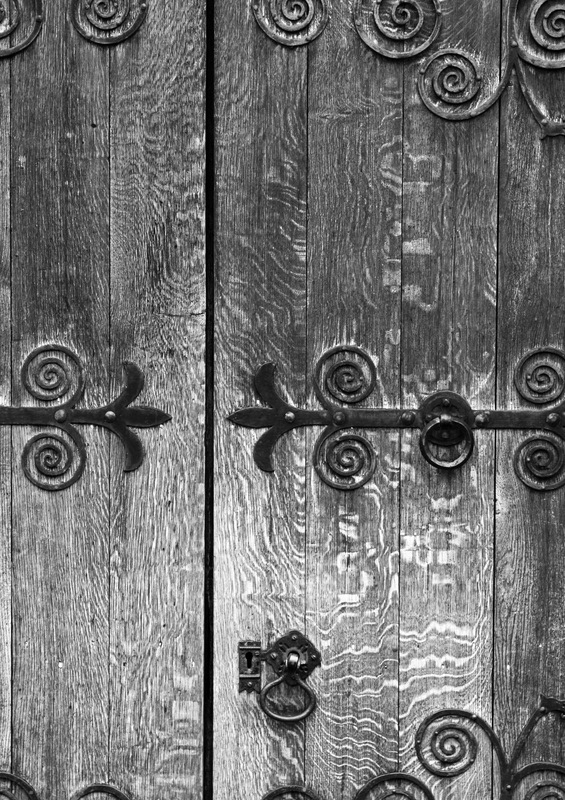
Someone leading a meeting about market town Brackley fancied a display of non obvious images of the town to intrigue people, and encourage them to chew over the details of the place. They didn't have to promote it or put any spin on, just get people looking and thinking. This is what I came up with... 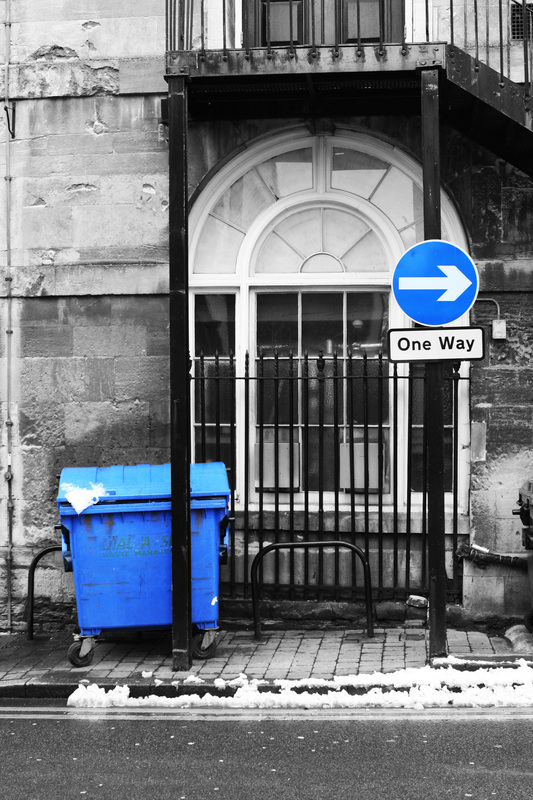


0 Comments
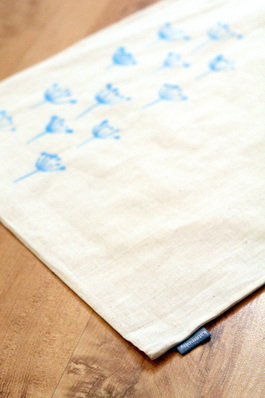
The Banyan Tree in Brackley - home of Fair Trade products and artisan crafts. Plus now some illustrated and photographic cards and hand printed fabric Kate Moby goods. Yay! 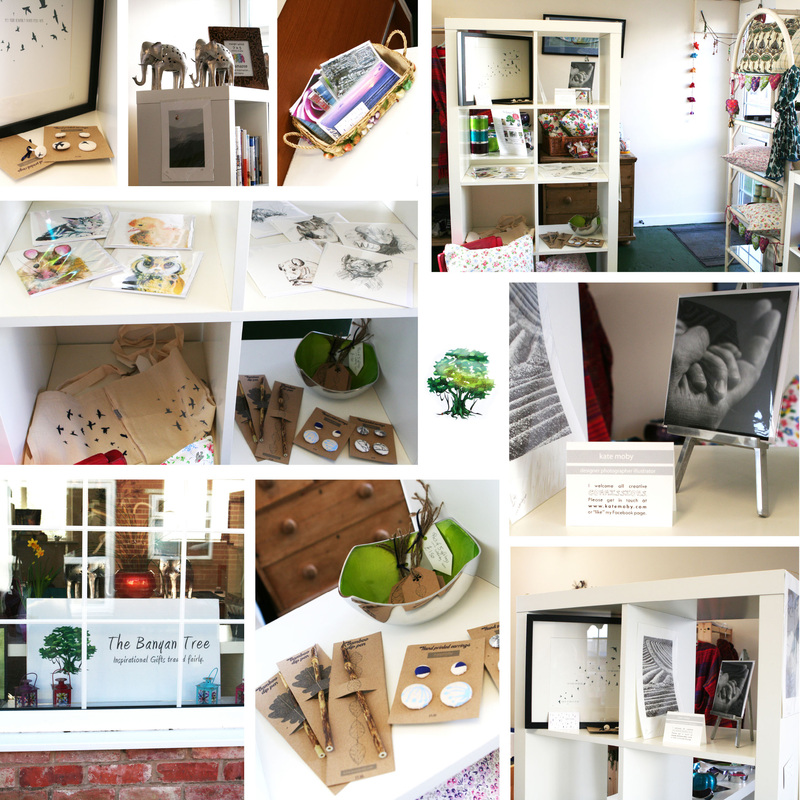
Plus they are connected to some pretty exciting workshop news coming soon... Watch this space!
Pretty ambitiously, I wanted to double the number of shops my products are in this year (a total target of 2...) Aim low and you succeed!! You can see and even purchase some friendly illustrated animal cards in the lovely tearoom and farm shop Limes Farm in Farthinghoe. I can personally recommend both tea and cake. 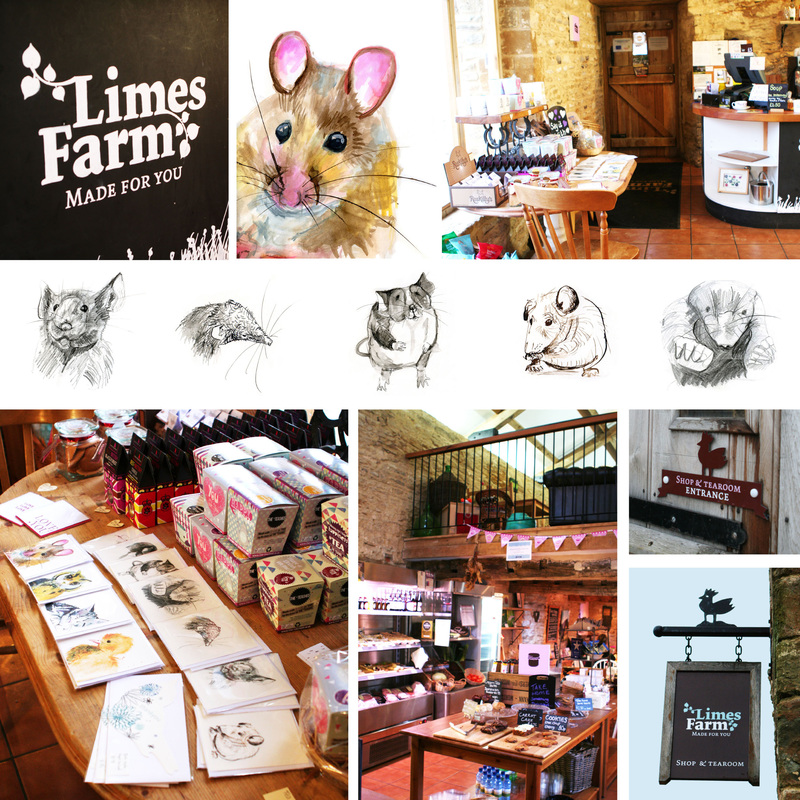
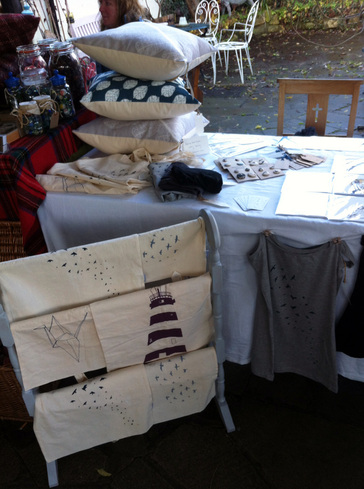
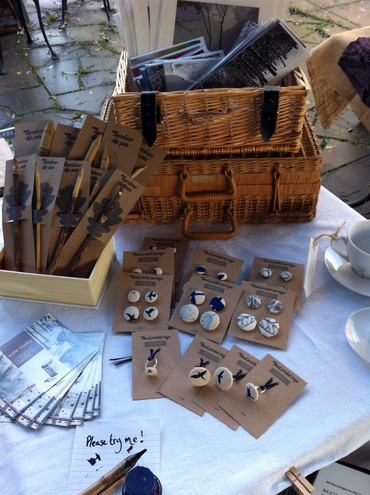
 Just got through the final market of the year (out of a grand total of two!) It was a lovely place and lovely people, but being outside for two days took its toll on my extremities! Saturday was very quiet, but Sunday picked up nicely. I met some other lovely stallholders, but am now kicking myself for not robbing some business cards, as I'd like to keep in touch... If you happen to be reading this, please drop me a message! One of my favourite moments of the day - a 10 year old boy trying out my bamboo dip pens wrote "Even in death may you be triumphant." That'd be Oxford for you! Forgive the low phone quality pics, my camera has gone travelling (with friends, it hasn't been stolen!) 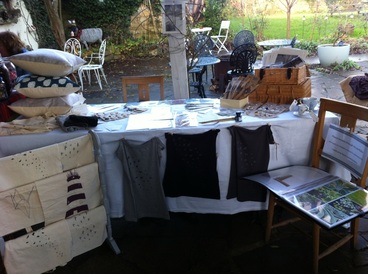
Merry Christmas!
Well I survived my first craft fair for a while! It was fairly quiet, but had some lovely chats with people, not to mention the first mince pie of the season! A huge thank you to everyone who came, next up The Perch on the 15th-16th.   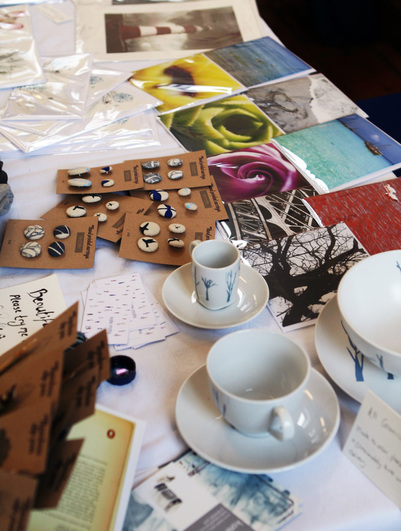 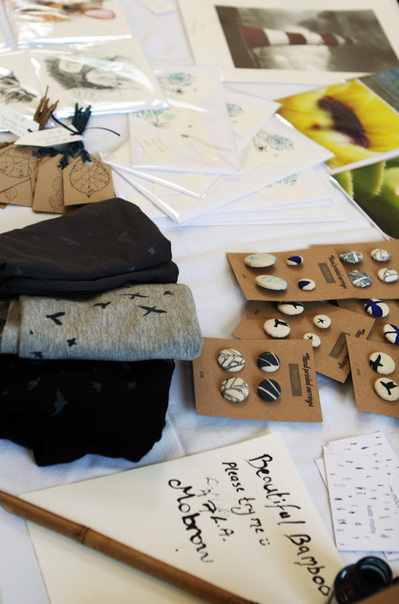 Sadly the market at the Old Needle Works has been cancelled because of flood issues... So I've signed up to this bad boy instead. Please come say hey:) 
I've launched myself somewhat tentatively at some Christmas markets this year... Please come and see me at: 2nd December The Old Needle Works in Redditch 15th - 16th December The Perch in Oxford If you let me know you visited because you've read this, I'll most likely be so grateful I'll throw free stuff at your face! 
As part of my new product investigation, which hopefully will be coming soon, I wanted to produce fabric labels to be attached to textile objects like cushions, bags, purses etc. I was pretty chuffed that they worked out so well, so I thought I'd spread the love with this little how to tutorial... 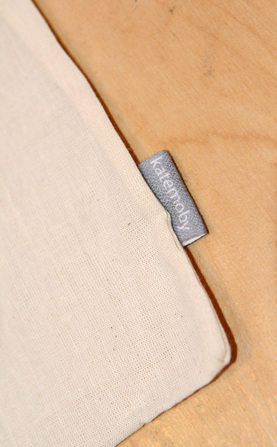
Step One I bought fabric tape in white from the land of the internet (eBay) that was wide enough for the design I had in mind. In my case, this was 25mm, so the edges of my labels always look neat and don't require any time consuming stitching etc. 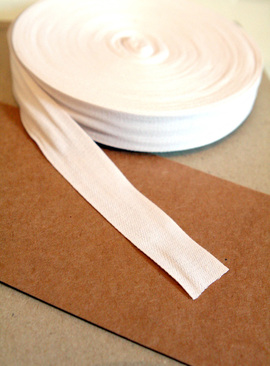
Step Two Using Indesign, I created a repeated design of my labels. On the first take I included my website, but this was far too finely detailed for the fabric to cope with, so I ended up keeping it simple and legible. The great thing about Indesign is that it's very controllable to the tiniest measurement, allowing for plenty of fine tuning in the printing stage. Whilst designing, you might want to consider making your design larger than the ribbon width to allow for some wiggle room in the printing stage. As my labels are going to be looped over, each individual label has text upside down as well as right side up. 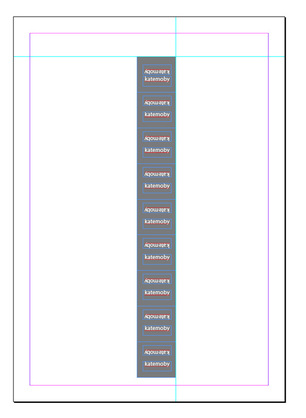
Step Three Next I used normal sticking tape to attach the ribbon at both ends to a piece of normal A4 paper. For extra security I put some double sided tape underneath the ribbon to make sure it was really secure and straight. Then I hit print! (Please note this is a tiny bit of a gamble, and I take no responsibility if your printer chews it up and spits it out in a huff...) It took a few takes of fine tuning to work out the exact millimetre placement of the ribbon to make it repeatable and guaranteed, so it's worth not cutting a really long piece first time. Having an understanding of which way round your printer feeds really helps with this! 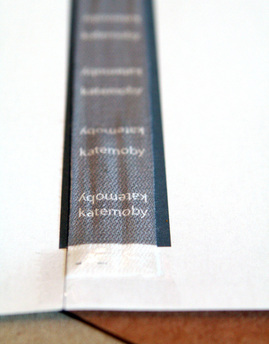
Step Four The fabric is fairly damp with ink when it first shoots out, so I let mine dry for a good hour, and then ironed it very thoroughly to make the ink set. Again, the success of this depends on your printer and the ink you use - it's definitely worth doing a test piece and washing it to check your ink will stay to avoid heartache! Then it's just a case of cutting up your labels, folding them and stitching them to anything and everything your heart desires! 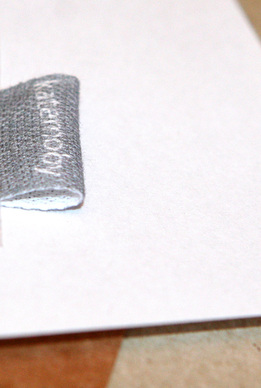
Good luck! Let me know how you get on!
The good people of Society6 also seem happy to stock my work in the form of phone cases, laptop skins and ipod houses! And for a limited time only, if you follow this link you get free shipping! 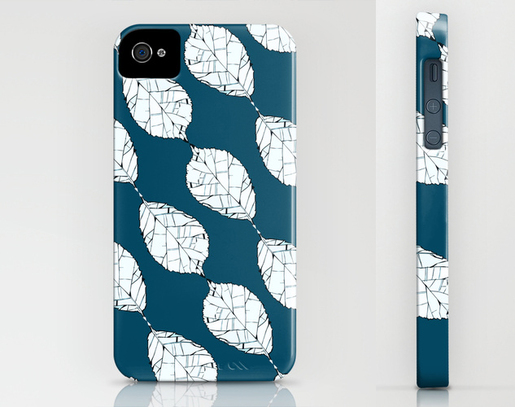 Happy shopping!
|
Archives
April 2024
Categories
All
disclosure
If my blog links take you to external websites, I may be receiving a commission for sharing these products. However, please know that all my reviews are my own thoughts and a true representation, and I would never share anything that I wouldn't or haven't personally used or enjoyed.
|
 RSS Feed